What Is a Support Bar and How to Choose One?
A Support Bar is more than a metal rail beside a toilet, shower, or stairway. It can provide a steadier handhold when floors become wet, balance weakens, or a user transfers between surfaces. The World Health Organization reports that about 1.3 billion people, or 16% of the global population, experience significant disability. That figure strengthens the case for safer, more adaptable spaces. However, one product cannot suit every person or room.
Ronald Mace, a pioneer of universal design, said, “The power of universal design is in its ability to include everyone.” His principle applies directly to Support Bar selection. A reliable choice should match the user’s strength, reach, grip, and movement pattern. It should also suit the wall structure. A beautifully finished bar is not safe if installers cannot anchor it securely into studs or proper reinforcement.
The 2010 ADA Standards specify important reference points, including a 250-pound structural load and common grab-bar diameters between 1¼ and 2 inches. These requirements offer a useful benchmark, but local rules and professional assessment still matter. Look closely at placement, clearance, surface texture, corrosion resistance, and installation height. A narrow bathroom may need a shorter bar. A user with limited hand strength may need a larger, textured grip. Choosing by appearance alone is an easy mistake. This guide explains what a Support Bar does, which specifications matter, and how to select one with evidence rather than guesswork.
What Is a Support Bar and What Purpose Does It Serve?
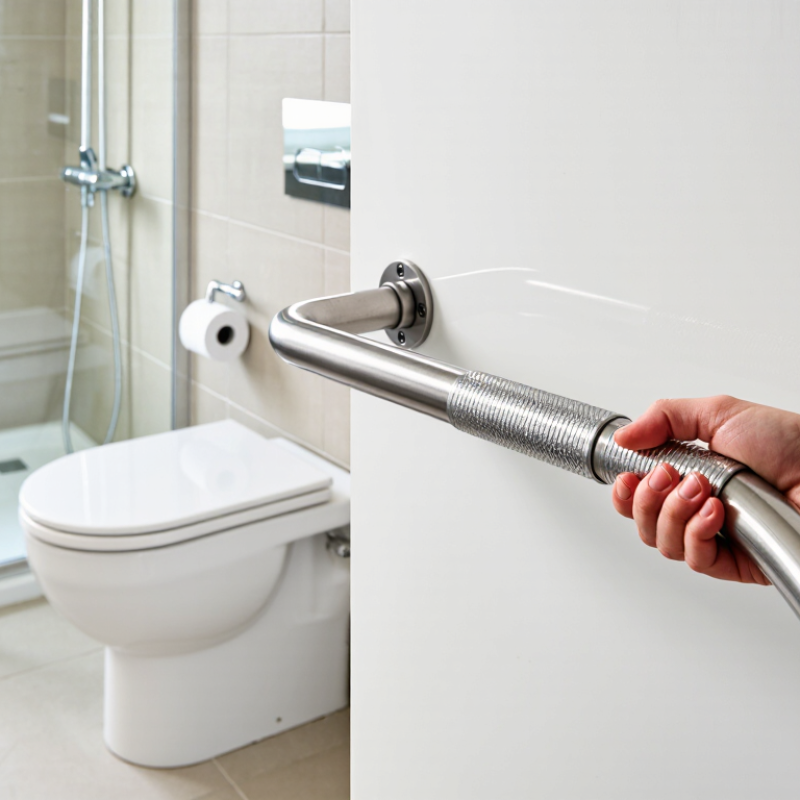
A support bar is a fixed handhold designed to improve balance, transfers, and stability. It is commonly installed near toilets, showers, bathtubs, and steps. Its purpose is practical: it gives the body a secure contact point when standing, sitting, turning, or recovering from a small loss of balance. It should not be confused with a towel bar. A towel bar may pull away under body weight, while a properly installed support bar is secured to structural material and selected for dependable loading.
Choosing one requires more than measuring the wall. Consider the user’s height, grip strength, movement pattern, and available space. A bar with a textured surface can reduce slipping when hands are wet. A larger diameter may suit weaker hands, but it can feel uncomfortable for smaller users. Length matters too. A short bar may fit neatly yet provide little help during a transfer. Mounting position is equally important, and professional guidance is wise when wall construction is uncertain. In my experience, a bar that looks perfect on paper can still feel awkward in use.
Tips: Test the planned position with removable tape before drilling. Sit, stand, and reach naturally. Check for studs or approved reinforcement, then follow the manufacturer’s installation instructions. Avoid relying on ordinary wall anchors unless they are specifically rated for the expected load. Small details matter. A secure grip can restore confidence, but poor placement may create another hazard.
What Are the Main Types of Support Bars?
Support bars provide stable handholds near toilets, showers, steps, and beds. Their shape and installation method determine how much support they offer. Choosing one is not only about appearance. Wall strength, user height, grip comfort, and moisture exposure matter just as much.
Straight horizontal bars are the most common type. They help users steady themselves while sitting, standing, or moving sideways. Vertical bars offer a firm pull-up point near a shower entrance or bathtub edge. Angled bars combine both movements, supporting a gradual rise from a seated position. Folding bars suit toilets with limited wall space, but their hinges need regular inspection. Floor-to-ceiling tension poles can help where wall installation is difficult. They should be checked carefully for stability.
Some bars attach to the floor and wall together. These designs can support stronger weight transfer, especially beside a toilet. Textured stainless steel or coated surfaces usually feel secure with wet hands. Smooth finishes may look cleaner, but they can become slippery. A small detail matters.
In practice, the best type depends on the user’s movement pattern. Measure before buying. A bar placed too high may be difficult to reach, while one placed too low can strain the wrist. Installation into weak drywall is a common mistake. Use suitable anchors or professional reinforcement. Even then, no support bar replaces careful assessment by a qualified installer. I would also recheck the position after daily use, because the first choice is not always the final answer.
Where Are Support Bars Commonly Used?
Support bars are commonly used wherever people need steady hand support, balance, or controlled movement.
Bathrooms are the most familiar location. A bar beside the toilet can assist sitting and standing, while a textured bar near the shower helps on wet floors. Placement matters. It should be reachable without twisting the body.
Stairways, ramps, and building entrances also use support bars.
They give users a stable grip when surfaces change height or become slippery. In healthcare rooms, bars may appear beside beds, sinks, and examination areas. Their position should match the user’s height and movement pattern. A bar installed too high can be nearly useless. That detail is easy to miss.
Support bars are also found in workshops, changing rooms, public transport areas, and some vehicles.
Workers may use them while entering equipment zones or moving around narrow spaces. In every setting, the wall structure must support the expected load. Fasteners should match the surface, not just the bar.
A practical check includes loosening, rust, sharp edges, and movement under pressure. Never ignore a slight wobble. It can signal a deeper installation problem.
There is no universal support bar for every location. Heavy-duty designs may feel excessive in a home, while a light model may fail in a busy facility. Professional assessment is worthwhile when users have limited strength, balance concerns, or changing mobility needs.
How to Choose the Right Support Bar for Your Needs
A support bar is a fixed handhold that helps people steady themselves near a toilet, shower, or bathtub. It is not a towel bar. The Centers for Disease Control and Prevention reports that more than one in four adults aged 65 and older falls each year. That statistic makes placement and structural strength practical safety decisions, not decorative details.
Choose the location before choosing the bar.
Near a shower entrance, a vertical bar can support entry and exit. Beside a toilet, a horizontal bar often provides better leverage during sitting and standing. Measure the user’s reach, door swing, and available wall space.
Key measurements
The U.S. Access Board recommends a 1.25 to 2-inch gripping diameter and at least 1.5 inches of clearance from the wall. Its standards also specify a 250-pound structural strength requirement. These figures guide selection, but local conditions still matter.
The wall is crucial.
A bar attached only to drywall may feel firm today and fail later. Mounting hardware should connect with studs or approved reinforcement. Check the surface after installation. It should not flex, twist, or pull away.
Choose textured, corrosion-resistant materials for wet rooms, and avoid sharp edges. A longer bar is not automatically safer; it may interfere with doors or movement. I once underestimated how quickly a small bathroom becomes crowded. That mistake is easy to repeat.
When uncertain, ask a qualified installer to inspect the wall and the user’s movement pattern. WHO identifies falls as a leading cause of unintentional injury worldwide, so small installation details deserve serious attention.
What Safety and Installation Factors Should You Consider?
A support bar is designed to steady a person during sitting, standing, or moving through a wet area. Choosing one starts with the user’s balance, reach, grip strength, and daily routine. A horizontal bar may help with transfers, while a vertical bar can offer leverage near a shower entrance. Measure carefully. Wet hands need a firm, comfortable grip, not a decorative towel rail. Short bars can look neat but may provide too little support.
The wall structure is critical. Tile alone cannot safely carry a person’s weight. An installer should locate studs or use fasteners approved for the specific wall material. Concrete, timber framing, and hollow walls require different fixing methods. Check the bar’s load rating, mounting points, and expected direction of force. Ratings are not enough if the anchors are unsuitable. Leave enough clearance for fingers, clothing, and moving joints. Avoid sharp edges and slippery finishes. Suction-mounted bars may assist temporarily, but they should not replace permanent fixing where a fall is possible. Local building guidance may also specify mounting height and clearance.
A careful installation includes checking the surface for moisture damage before drilling. I would rather delay fitting than hide a weak wall behind new tiles. Do not improvise. After installation, apply gentle pressure from several directions and inspect for movement. A small shift matters. The user should try the bar with a professional nearby, using normal footwear and realistic movements. Even good advice can miss personal habits, such as pulling sideways instead of downward. Reassess the bar after repeated use, especially if the room becomes damp or the wall finish changes.